It’s a new year and many chiropractors are evaluating what will enhance their respective practices, particularly as it relates to their bottom line. One of the most common questions I get is: “Do I need to be credentialed to bill insurance, and what are the best plans to join?” It’s a loaded question – but one every DC ponders. Whether you're already in-network or pondering whether to join, here's what you need to know.
The Upper Thoracic Spine and Posterior Ribs
Consider an area we work on every day - the thoracic spine and posterior ribs. Each of us has a favorite method to assess and adjust this area. Allow me to suggest a few more tools for your toolbox. It is common for chiropractors to focus on the obvious rotations in the thoracic spine. We certainly need to address these, but first I suggest looking at where the spine lacks flexion or extension, then adding side-bending and rotation components.
In the upper thoracic spine we often find what I was trained to call "anteriorities" (an upper thoracic "saucer"). Within an area of anteriorities, the vertebrae tend to be stuck in extension and resist flexion. The upper thoracic spine typically has segments that resist flexion. You can test this by performing any form of motion palpation. I'll describe the assessment technique I prefer below. This assessment is a combination of our "beginning" feel (initial response testing) with the palpation tools taught in muscle energy technique.
Sit behind the seated patient. Run your thumbs or thenar pad down the paraspinal area, and scan with a gentle posterior-to-anterior pressure for restriction. The restriction is usually more obvious on one side. Once you find a restriction, test for lack of flexion versus lack of extension. I combine an inch or so of trunk flexion or extension with pressure from below or above. It is not necessary to go through the full range of motion. To test for lack of flexion, I contact below the transverse process and lift it from inferior to superior. Next, I contact above the transverse process and test for lack of extension with a superior to inferior motion. I test the "beginning feel" of the motion, as outlined in a previous article (www.chiroweb.com/archives/19/16/12.html). This establishes the first dimension - the lack of flexion or extension - and tells me which side is more restricted.
Second, the side of prominence or restriction is the side the vertebra has rotated toward. If the vertebra resists flexion, the side of restriction (the side it is rotated toward) will become more prominent as the patient flexes forward. The facet on that side is stuck closed, so it cannot open as the patient flexes. The restricted segments move asymmetrically with flexion, producing a prominence on the involved side. Test this visually and via palpation, as the patient flexes or slumps forward. Test this further by using the transverse process to "derotate" the segment, or evaluate if it can rotate toward the other side.
Third, evaluate side-bending. Bring your active hand across to the opposite side of the spine and test from the spinous process. Side-bend the whole trunk away, and see if that spinous can move toward the convex side. Remember how the thoracics are configured. The spinous process is located quite a bit below the transverse process, especially in the mid-thoracics.
In a physiological subluxation, or type-2 dysfunction, the rotation and side-bending go in the same direction. When rotation and side-bending are in opposite directions and involve just one segment, this implies a nonphysiological motion, a translation to one side. Confirm this by motion palpating from the spinous-lamina junction, pushing medially. This side of the spinous will be quite tender, and will feel completely restrictive. The translated segment needs the "engage, listen, follow" (ELF) procedure or recoil correction in the direction of restriction. The muscle energy technique doesn't work as well here.

Muscle energy, or postisometric relaxation applied to joints, is usually my first choice to correct physiological subluxations, those that occur along the facet joints, in the thoracic spine and posterior ribs. I perform my assessment and my correction sitting.
Here's the correction (You can review the principles of the technique in my previous article at www.chiroweb.com/archives/19/18/07.html):
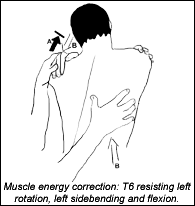
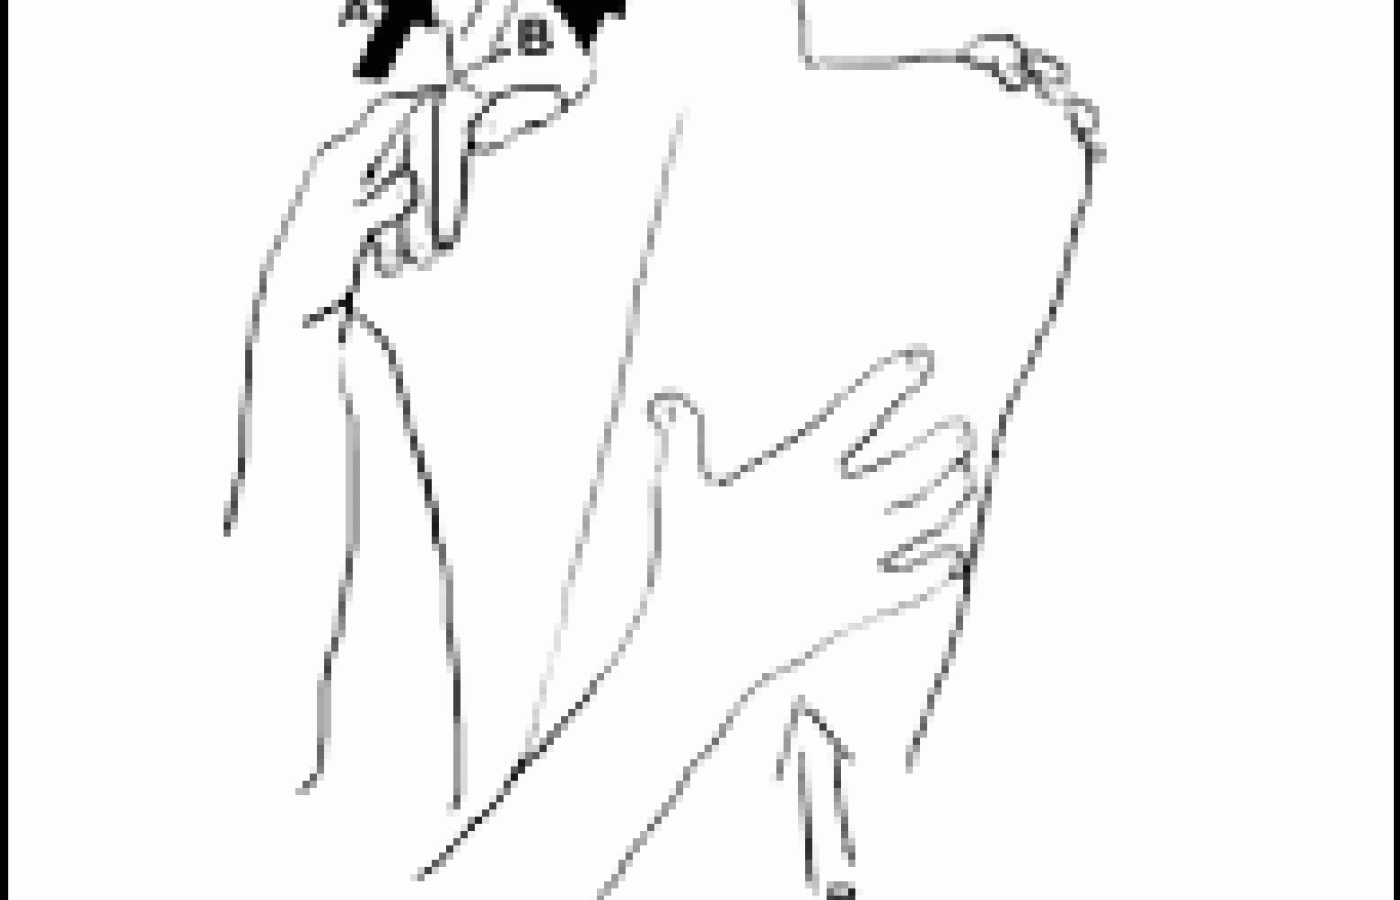
In this example, T6 resists left rotation, left side-bending and flexion. The patient is sitting, and the doctor sits behind or beside the patient on the left side. (A motion palpation stool works great for this.) Contact the right T6 transverse process with your right thumb or hypothenar pad. You'll control the patient's entire torso, primarily through having your other hand on top of the patient's left shoulder, while the patient's arms are crossed across his chest. Move the patient into left rotation to the soft barrier, then add left lateral bending to the barrier; finally, add flexion to the barrier. As you take up each dimension, the following dimension will need less motion, so you will not be bend the patient far into flexion. As a beginner, perform these adjustments one by one. As you get more experienced, you can combine them. The restricted segment is the fulcrum; you want the motion to center here.
Have the patient gently pull upward with the left shoulder (arrow A in the figure on page 27) while you resist this motion with your hands. Ask the patient to use the whole spine to do this, activating the deep paraspinals on the right side. After 3-7 seconds, ask the patient to relax, going further into left rotation, left side-bending, and flexion (arrow B in the figure). Go far enough to feel the barrier recede under your right hand. Repeat the isometric gentle contraction 3-5 times, each time following with gentle motion further toward the barrier. Just follow that motion, or provide a gentle push with your right hand. By the end, the joint will feel softer, and the restriction will be gone. If the restriction is not at least 60 percent released, and much less tender, you haven't completed the adjustment. Your technique could be imperfect, or there may be a more primary lesion keeping the joint from releasing fully.
There are two common errors for beginners, usually caused by patients who are pushing too hard, or wanting to continue moving. The goal is to activate the small intrinsic paraspinal muscles with this technique. Too much resistance co-contracts the larger muscles. The contraction should be isometric, just coming up against the barrier your resistance provides. The doctor's main error is to take the segment too far into the barrier. We are so used to working at the locked edge of the barrier. In all of these low force methods, we want to work at the soft, feather edge where the elasticity remains. You will be amazed at how your results improve once you stay at the soft edge of the barrier. The other key is creating a fulcrum at the restricted level. Most of our chiropractic techniques use short levers, where the fulcrum is less critical. These techniques use a long lever and much less force. The fulcrum is essential.
Vertebrae resisting extension are a little different; I'll leave that for my next article. Please use these ideas to help more of your patients. Get excited about learning more about the wondrous human body, and about our chiropractic art and science. If you are "jazzed" about what you're doing, you'll stay "forever young" in your work, and your work will feel like play.
Quick Tips for the Posterior Ribs
- The first few ribs tend to be very difficult to release with diversified adjusting. Low-force techniques are great here. The first rib's main subluxation pattern, in my experience, is to be stuck anterior and superior. You can reach this best by positioning yourself anterior to the upper trapezius, releasing it using ELF, and pulling the rib back and down.
- Rib subluxation direction - Does the rib resist superior motion, or does it resist inferior motion? This will usually correlate with the associated vertebrae. When the vertebra resists flexion, the rib usually resists superior motion. When the vertebra resists extension, the rib usually resists inferior motion. You can correct these with muscle energy, using techniques similar to those described above. The exceptions here are significant. Also, when the vertebra resists flexion, and the rib resists inferior motion (extension), you have a very significant clinical problem. The region is stuck and can't move in any direction. These can be diagnostic puzzles that may be critically important to correct. Look for this when your adjustments don't seem to fully loosen an area, or the subluxation recurs.
- Structural ribs - This is a term osteopaths use for nonphysiological subluxations, usually trauma-induced. In the back, one rib will feel like it is pushed directly posterior, while there will be a depression at the sternocostal junction of the same rib. The reverse can also happen with the rib anterior in the front, and stuck forward in the back. These can be corrected with recoil or ELF.
- Sprung ribs - This concept is inspired by George Roth's matrix repatterning classes, level two. Dr. Roth talks about how trauma is stored in the body. A sprung rib is sprung outward, and will be posterior in the front and back. This is usually caused by a trauma that came in from the opposite lateral side, causing an expansion of the rib cage on the involved side. This is corrected with simultaneous recoil from both the front and back. The adjustment is very gentle, but the results can be spectacular.
Resources
- Rex L. Introduction of Muscle Energy Techniques (course notes):244-9.1996 Ursa Foundation, Edmonds, WA.
- Roth G. Tensegrity (matrix repatterning) seminars, 1999-2001.
- Bookhout M. Evaluation and treatment of the thoracic spine and rib cage, seminar, 1999, Medford, OR.
- Greenman P. Principles of Manual Medicine, 2nd edition. Williams and Wilkins, 1996
- Heller M. Framework classes and Dynamic Chiropractic articles.


